Forum

Forum Navigation
You need to log in to create posts and topics.

Help me i'm stuck / I have a question

Dear Builders,

If you have any question let me know. We will help you 🙂


OnlinePagan has reacted to this post.
OnlinePagan

Hello,


Compliments first for the awesome design. As i have only a small print bed this is realy one of a kind.

I will start the destiny shortly with tamiya tt02 size.

It took me really sometime to gather all the print instuctions and parts. And still i am not sure.

Can you make a short print instruction for the special parts that needs extra attention with orientation, infill and support.


Second i would like to have the dif tamiya partnumbers and the rearaxle asswel.  Maybe add it to the BOM?


Thanks


Szilard and OnlinePagan have reacted to this post.
SzilardOnlinePagan

Hello Jan,
all the parts of the Chassis need to be printed with 20-30% infill.
The special parts highlighted in the video are printed like shown, all the others are in a laid position.
My brother will put all the files in a coordinate system when exporting them. This will mean they would be set in a printing position as default.
Unfortunately, he was a lazy f**k when did the export, he made a promise to me that he will remedy this issue very soon!
The Differential is not a Tamiya part its from HSP. You can buy it from ebay, just type in HSP differential and browse from the listed pop ups!

Peace Out

OnlinePagan has reacted to this post.
OnlinePagan

Hi,

I’m facing Issues with Part: “32_Rear_HUB_10x15x4_Bearing_(printed_rear_wheelaxle).STL”. It brakes all the time. Tried different Orientation. Also printed in 100% infill and of course only in ABS but it brakes immediate, after the first small Jump, near the back Rocking arm Mount. It looks like they is not enough material to survive shocks. Have you any Idea how to get the Part more stable. Next think come in my mind it to use Carbon Fiber filled material.


Uploaded files:
  • IMG_1117.jpg
Szilard has reacted to this post.
Szilard

Hello,

did you try this orientation too ?

On the picture you shared I think it is the worst 🙂

Using the big bearing here makes the wall thickness less thick than it is with the smaller one.

Try the smaller version with the tamiya shaft. It could be sturdier.

I try to figure out something for the big bearing version, but I’m not so confident because there is no more space to make the wall any thicker due to the rocking arm.  I have to be honest we used the smaller version for more of the jumps and it never broke.


Uploaded files:
  • print_orientation.png
  • eaece152-aac3-4a54-8424-ce24299c63e6.jpg

Hi,

Yes, I have tried almost all possible orientations and it keeps braking. So  I will go for the tamiya shaft but have to order the needed bearings. I already using metal dogbones from an older RC Car which fits by a chance, but this destroy the Rear_Printed_Axle very fast. So the switch hopefully will solve two Problems at once for me.

Since the built it was not possible to drive more then 30 sec. till one part give up.

BTW: I trying to drive with a 2845 brushless with an 35A Controller, which is also from the same RC Car as the dogbones, but the clutch is falling apart very fast. I will switch to a brass clutch very soon.

Hi,

this motor is very very powerful. We never even got close to test DESTINY with a beast like that 🙁
We would recommend the same motor we used, it seems there’s a limit been reached for now. We develop further… Your experiences help us, they are highly appreciated!

First of all, what an awesome design! <3

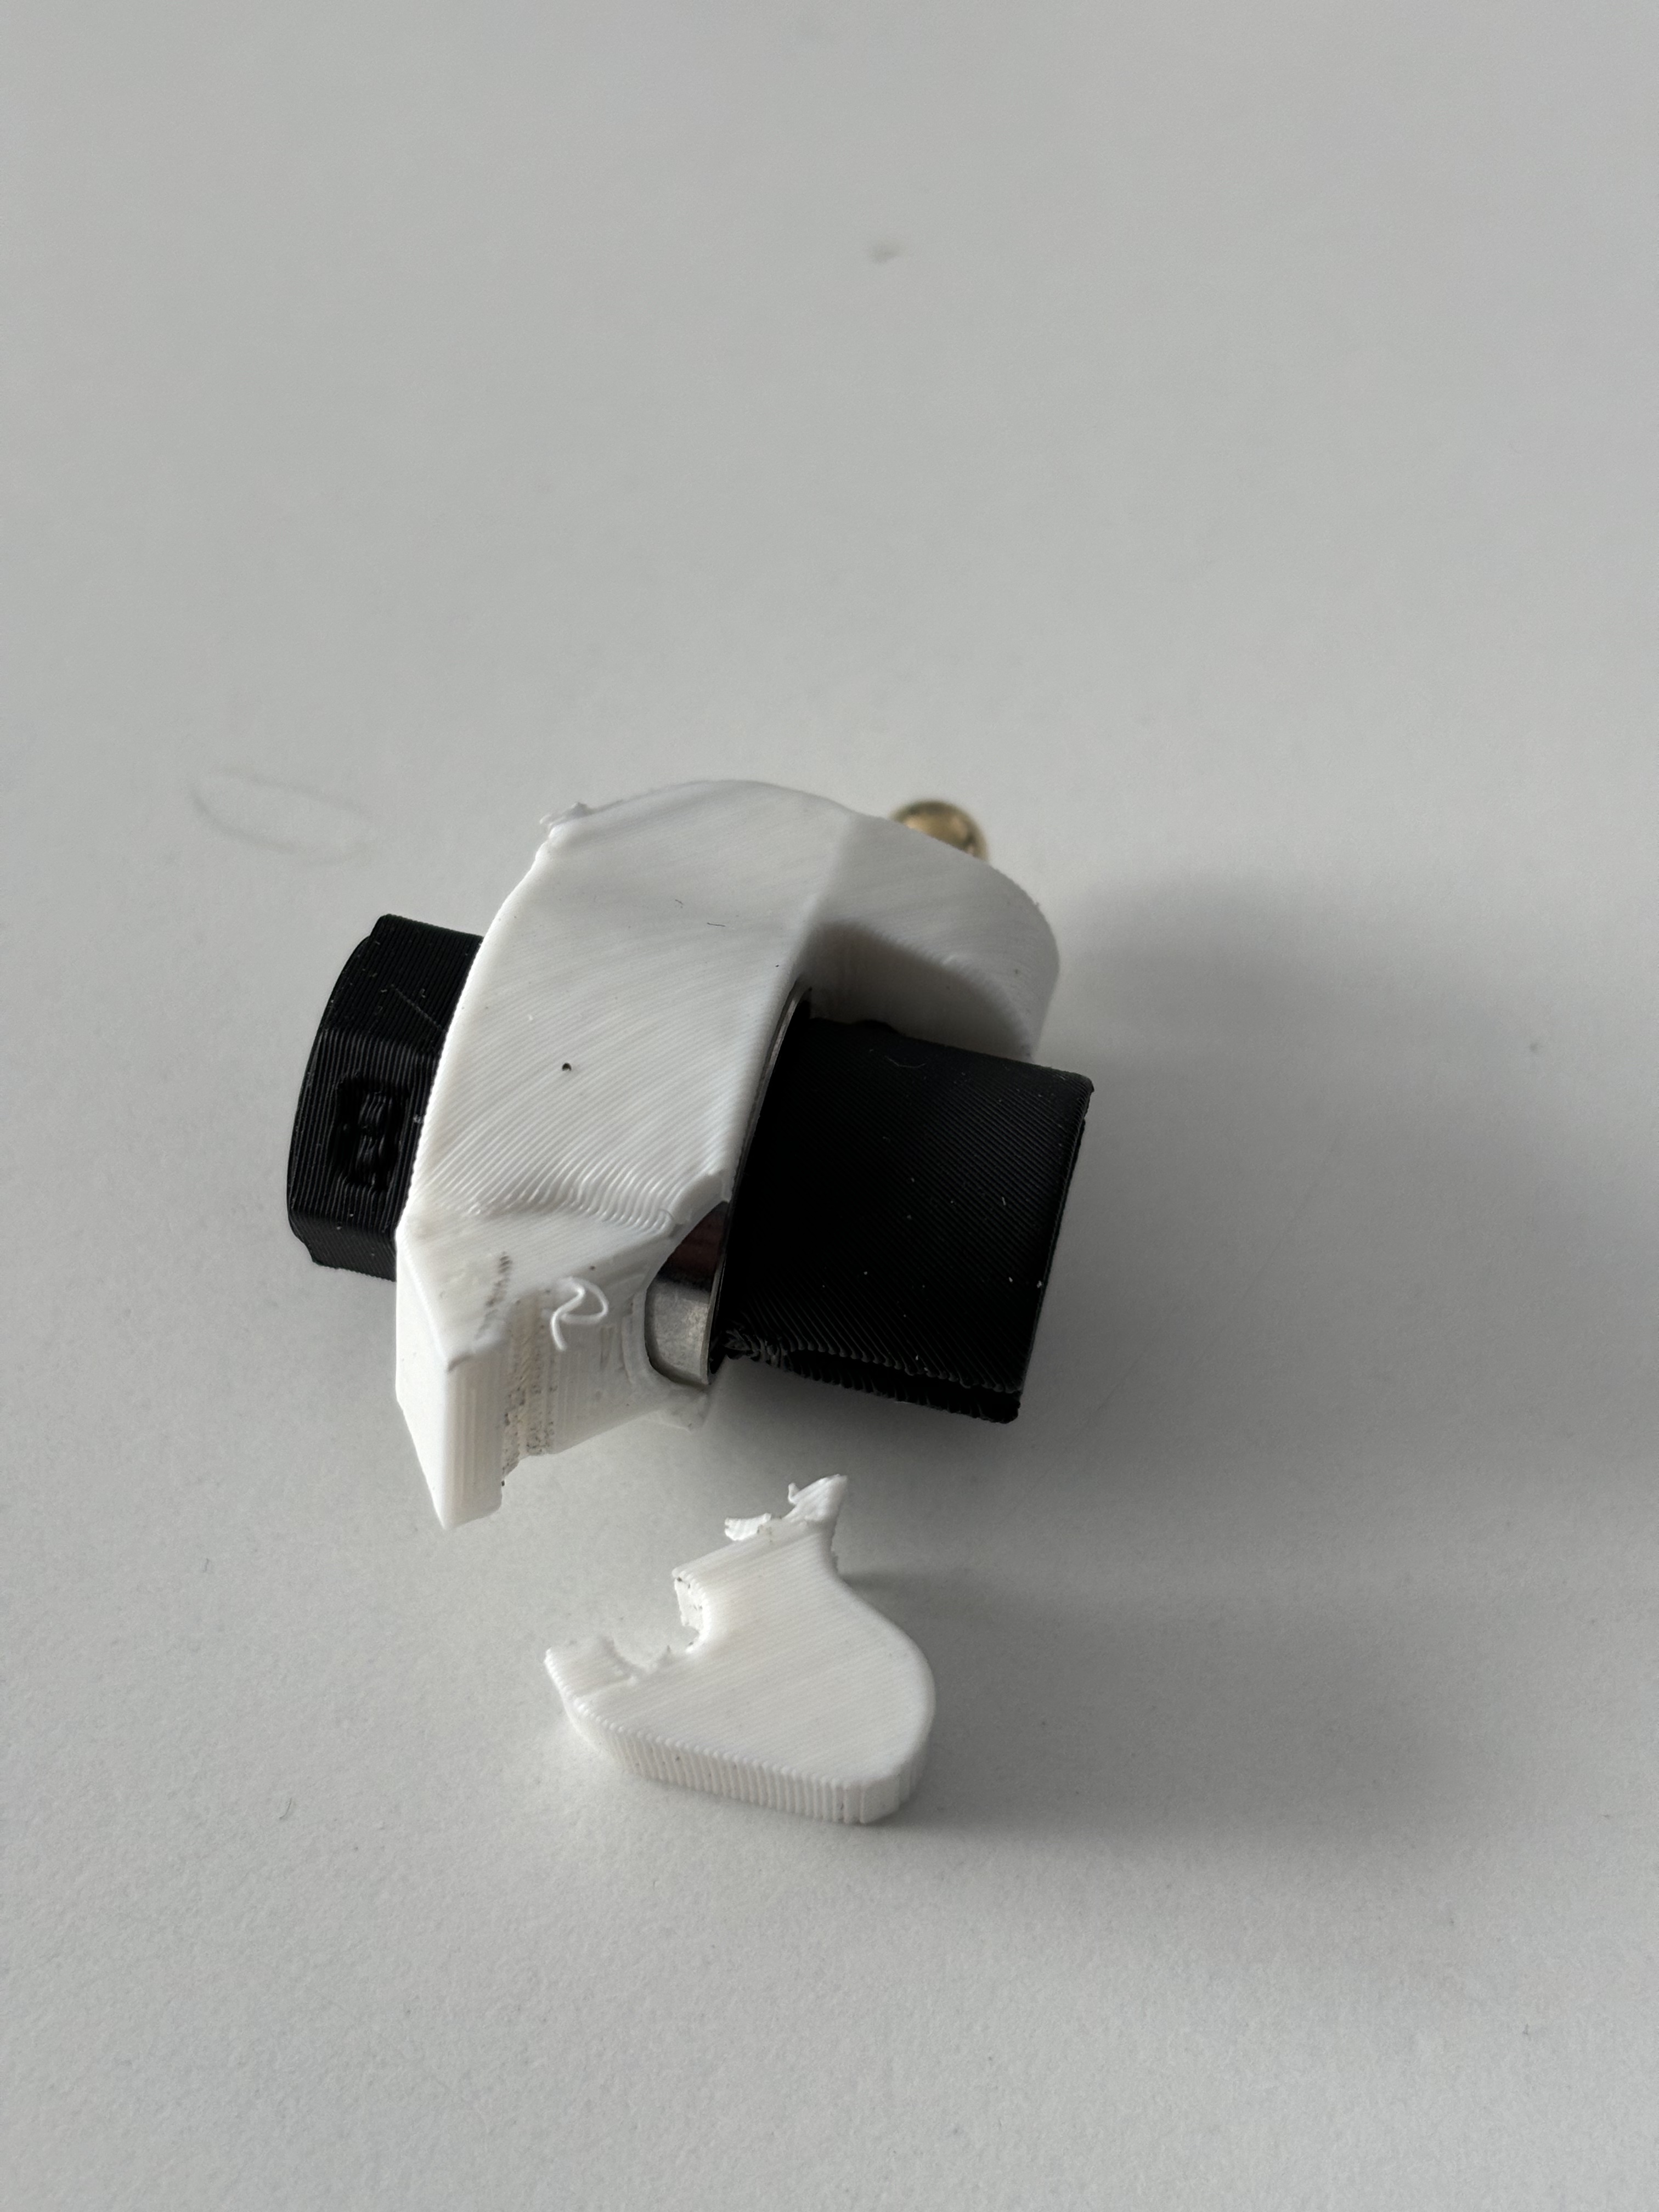
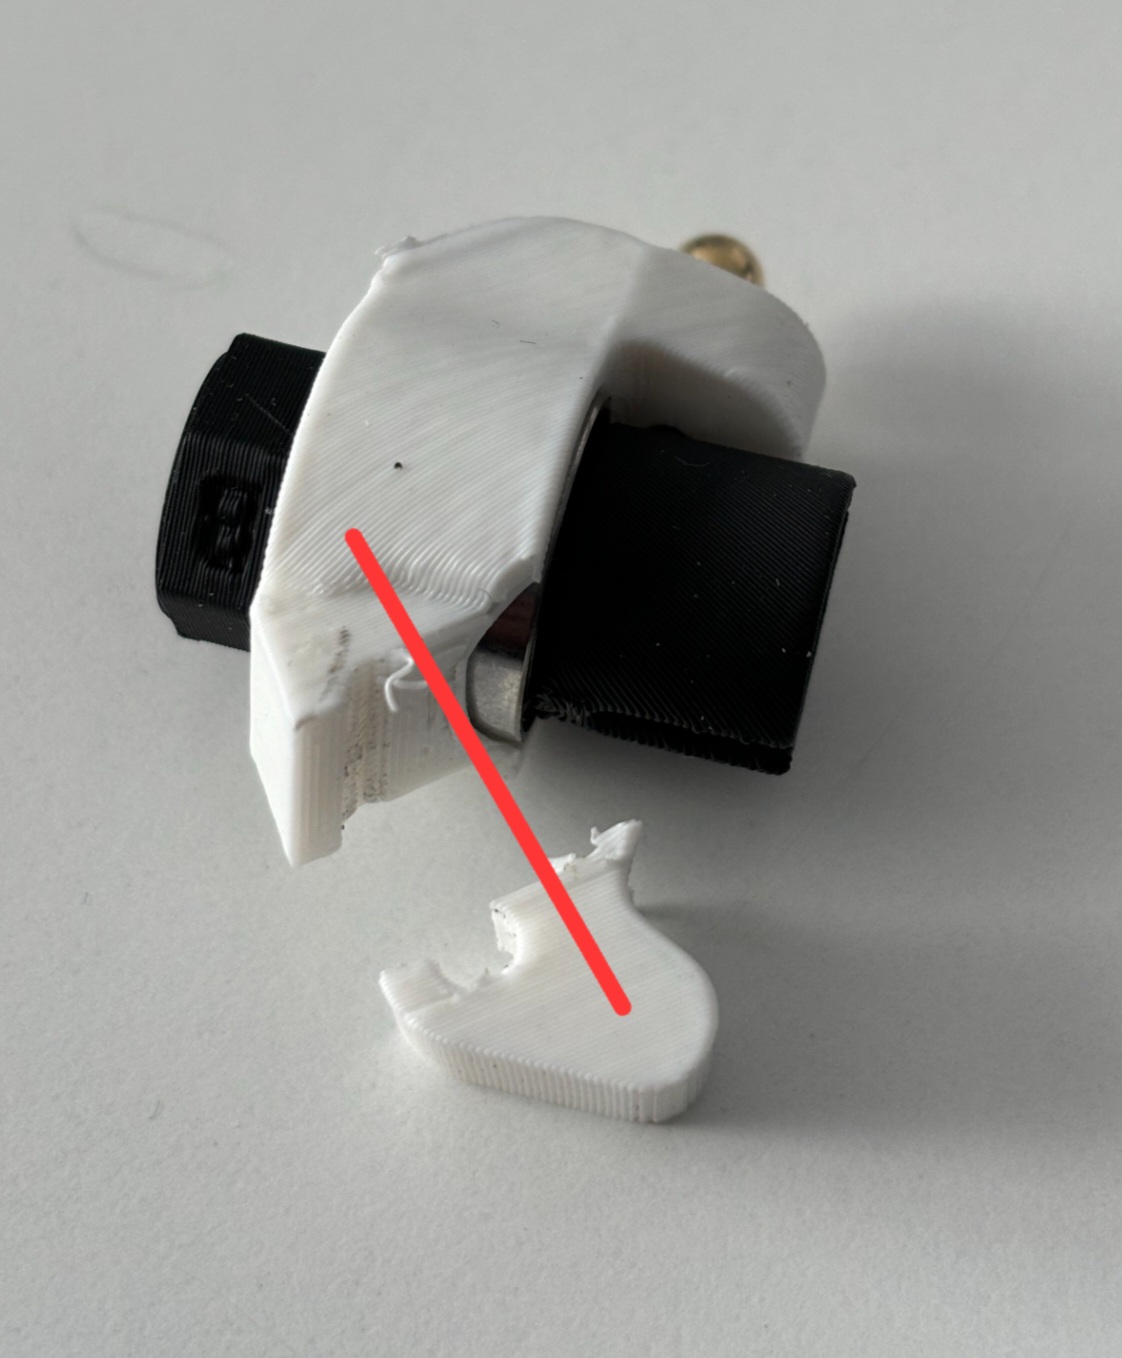
There is one part that’s giving me some problems: “52_Printed_bevel_gear_Clutch_to_pinion”. After a couple of driving sessions, the motor can turn freely inside this part. The flattened hole became round. This might be because my motor gets hot, or my motor is too powerful, or the shaft can be inserted deep enough? I tried to print it with PETG & PLA+, in a couple of orientations.

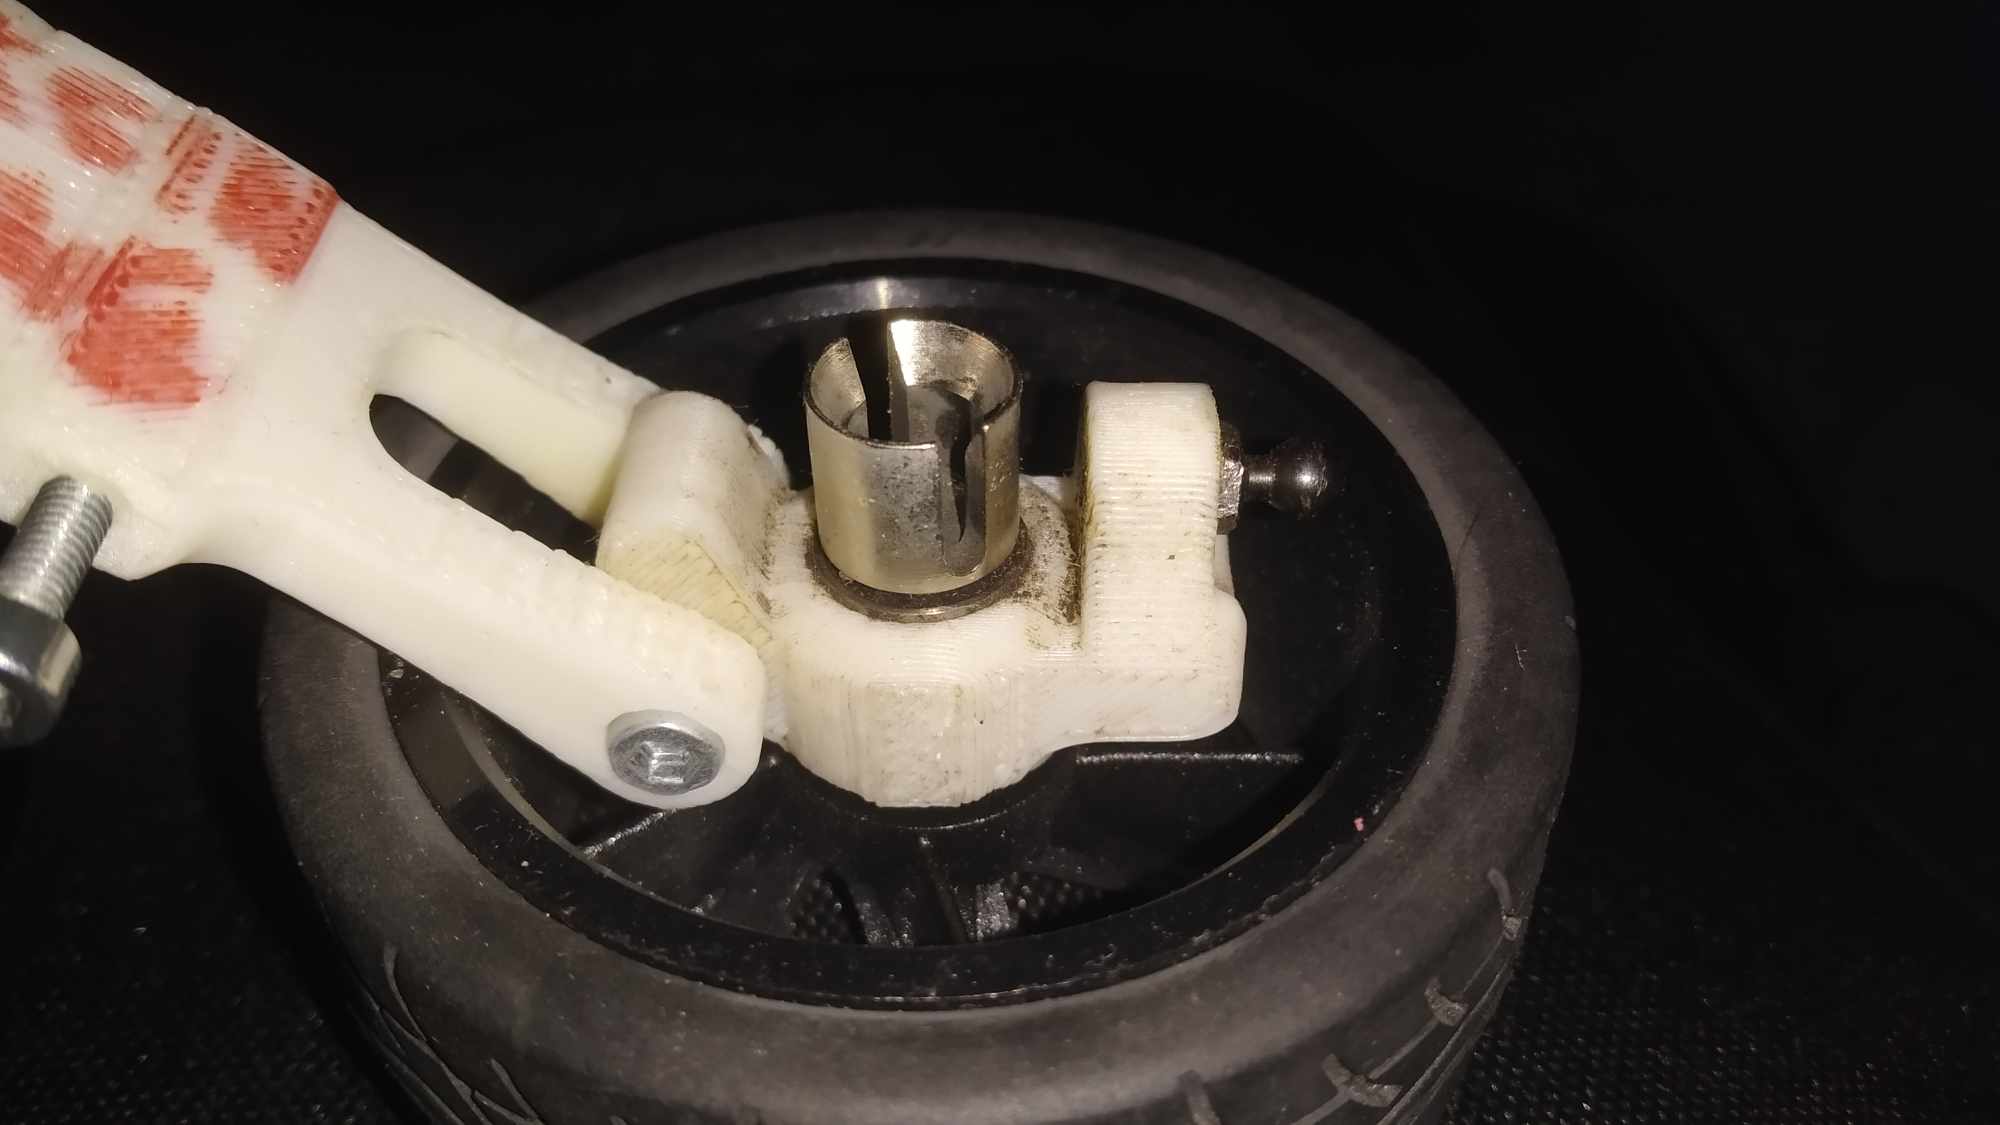
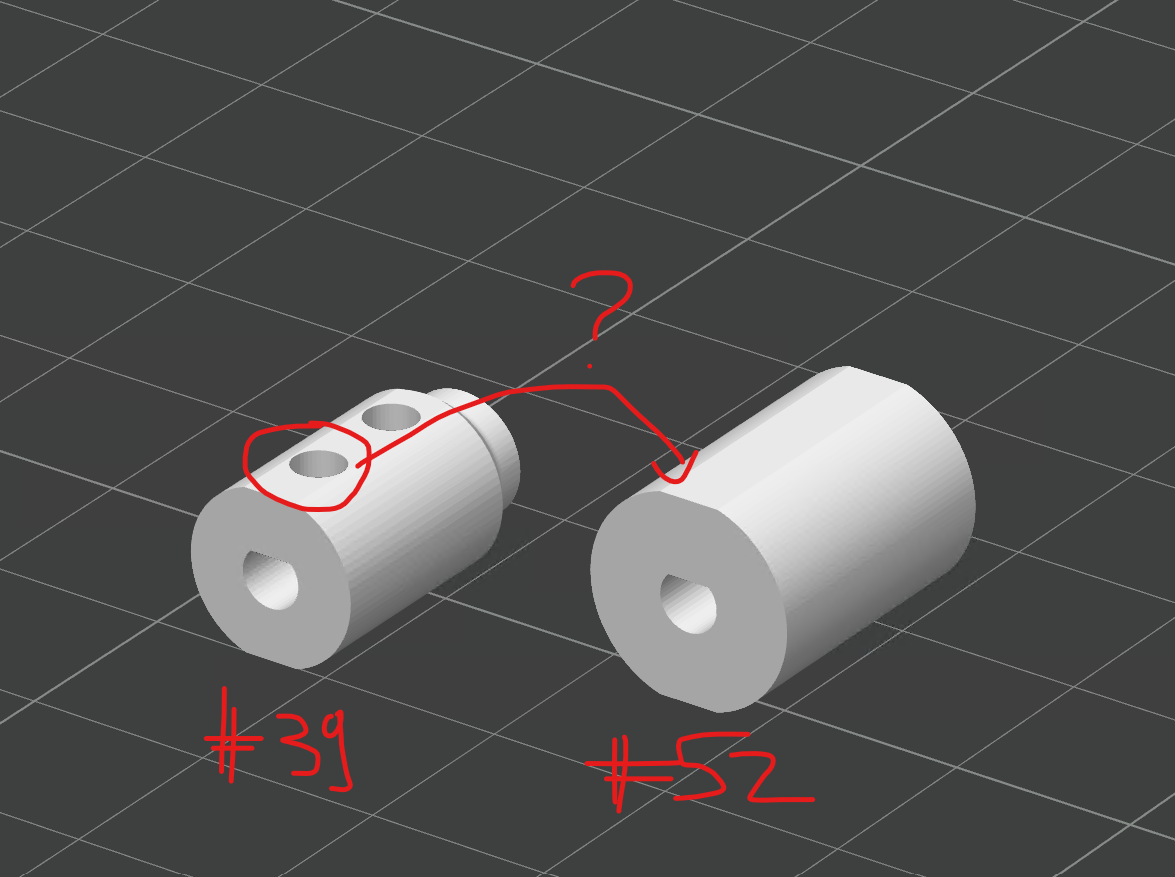
I noticed that the same part (when using the metal differential, “39_Clutch_motor_gearbox_for_Ebay_Differential”) has a little hole to put in a screw so the motor shaft is secured. Could the fix be as easy as adding the small hole to “52_Printed_bevel_gear_Clutch_to_pinion” as well?

Uploaded files:
  • Screenshot-2024-04-19-125657.png

Hey Jan,

First of all thanks for spotting this issue and being the first who’s SUPPORTING us!
You kind of initated a “cataclysm” as My brother re-designed the whole piece. We hope these modifications will last and remedy the issue/s.

Modifications:

  1. M3 Screw to fasten the Motor Shaft and Clutch together.
  2. Built in M3 nut into the Clutch for the Pinon head joining.
  3. Pinon Head Back is form fitted for a sturdier connection.

Here is a post about the new features:

DESTINY’s Clutch Re-Design and Further Development

Download DESTINY again in order to get the new STUFF!

Please test these new features with your “powerful” motor, hopefully it can withstand its higher torque now!

jt has reacted to this post.
jt
Quote from Arrgument on March 28, 2024, 5:17 pm

Hi,

I’m facing Issues with Part: “32_Rear_HUB_10x15x4_Bearing_(printed_rear_wheelaxle).STL”. It brakes all the time. Tried different Orientation. Also printed in 100% infill and of course only in ABS but it brakes immediate, after the first small Jump, near the back Rocking arm Mount. It looks like they is not enough material to survive shocks. Have you any Idea how to get the Part more stable. Next think come in my mind it to use Carbon Fiber filled material.


Maybe you can try to drill (or draw) a hole and put an M2 or M3 bar inside?

It will become a composite material then))

Also it can be added to the steering bar printed with the balls. I will try such variant because i have nowhere to buy ballhead screws in the country I’m living in.

Uploaded files:
  • Screenshot_20240503_085043_Chrome.jpg
Szilard has reacted to this post.
Szilard

advertisement